Yesterday, I shared on Facebook that I was making Brownie Swirl Cheesecake and found several people who wanted a piece so today, I'm going to share the recipe and the pictures with you. It's not hard to make and the results are to DIE for!!
Recipe:
1 Pkg. (8oz.) Brownie Mix (make according to the package directions for chewy fudge brownies)
2 8 oz. packages cream cheese, softened
1/2 C. Sugar
1 Tsp. Vanilla Extract
2 Eggs
1 C. melted milk chocolate chips
Whipped cream and miniature chocolate kisses, optional
1 Pkg. (8oz.) Brownie Mix (make according to the package directions for chewy fudge brownies)
2 8 oz. packages cream cheese, softened
1/2 C. Sugar
1 Tsp. Vanilla Extract
2 Eggs
1 C. melted milk chocolate chips
Whipped cream and miniature chocolate kisses, optional
Step 1: Prepare brownie mix according to package directions. Mine called for an egg, 1/2 c. water and 1/3 c. Vegetable oil.
Oh, and we CAN'T forget that package of fudge included in the box. Remember, its whatever brownie mix you choose to use.

 Mix according to box directions, mine said, "stir about 40 times".
 It ends up looking pretty put together, I was surprised!
 And here it is in the 9" Springform pan after cooking for 15 min. at 350 degrees. (The brownies will not test done at this point) Let cool for 10 min. on a wire rack. While that is cooling, let's get going on the cheesecake!
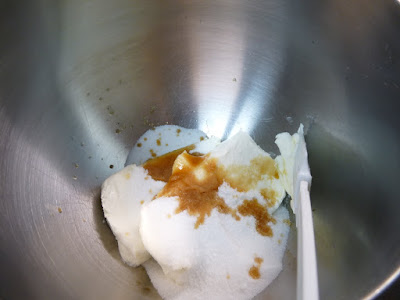
 2 pkgs. of softened Cream Cheese
 Add in 1/2 c. of sugar and
 1 tsp. of Vanilla Extract
 Now add 2 eggs, one at a time, beating well after each addition.
 There, they look like they are being beaten well... gotta love those Kitchen-Aid Mixers!
 And I like to toss in a couple of Tbsps. of Sour Cream.
 Then pour the cheesecake mixture over the cooled brownie crust.
 Over a pan of hot water place a bowl and put your cup of Milk Chocolate Chips to melt. (Yes, I had Semi-Sweet chips pictured but went to the store for the Milk Chocolate ones)
I usually keep my water on a very low boil under the bowl. In a couple of minutes, you will have perfectly melted chocolate.
 Drop the melted chocolate over the top of the uncooked cheesecake mixture and cut through the batter with a knife to swirl the chocolate. Bake at 350 degrees for 35 to 40 minutes of until center is almost set. Run a knife around edge of pan to loosen; cool completely. Remove sides of pan; refrigerate for at least 3 hours. Garnish with whipped cream and chocolate kisses if desired.
Yeilds 8-10 servings
This is one rich cake. As a matter of fact, I could only eat a little petit four size piece.
Things I would do differently:
I used a 10" Springform pan because that is what I had. Definitely try for a 9" pan. Mine was just a bit thin and I think a 9" would have looked beautiful!
I used a Ghirardelli Brownie mix and it was almost too chocolately. Next time...just a plain mix.
We were so excited to EAT the cheesecake that we completely forgot to put the whipped topping and Kisses on top. Would love to try it that way.
Oh, and don't bake it on a super hot day when the house is already about 90 degrees. It was killer hot in my house!
If you'd like to try it for yourself, you can find the recipe HERE.


Comments